Unlimited Bandwidth
VPN Account Setup Guide in Windows Vista
- in Windows 8
- in Windows 7
- in Windows XP
- in Windows Vista
- in Mac OS X
- in iPhone, iPad, iPod Touch
- in Android
How to setup VPN in Windows Vista
The following guide works for Windows Vista Home Basic, Home Premium, Business, and Ultimate.
1. Before creation your VPN connection please make sure that you have up to date version of Windows Vista.
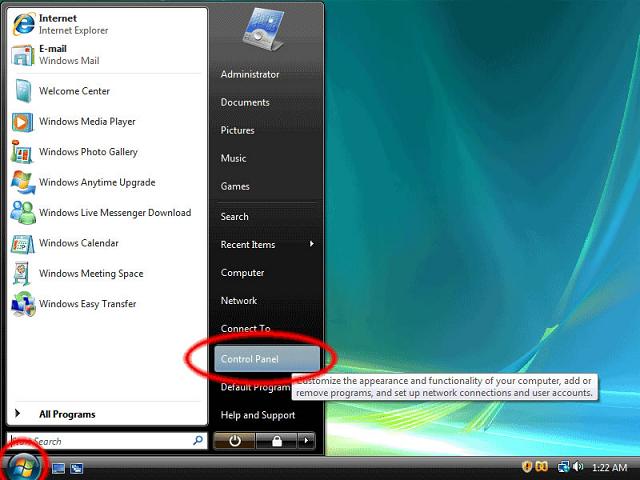
2. Click on the Start button and select "Control Panels".
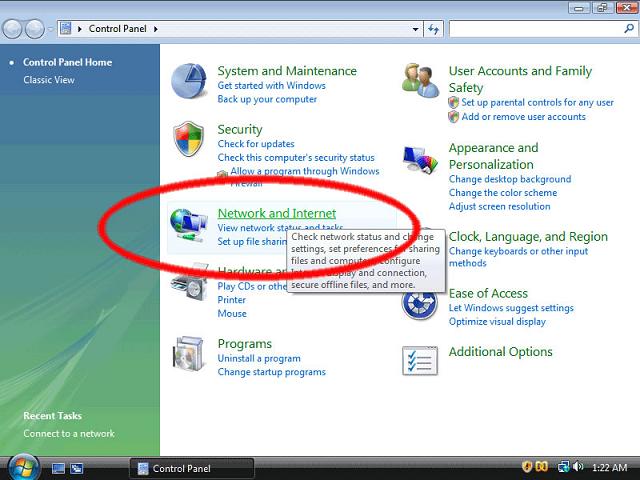
3. On the Control Panels click on the "Network and Internet" (circled in red below).
4. Click "Connect to a network" option.

5. Then click select "Set up a connection or Network."

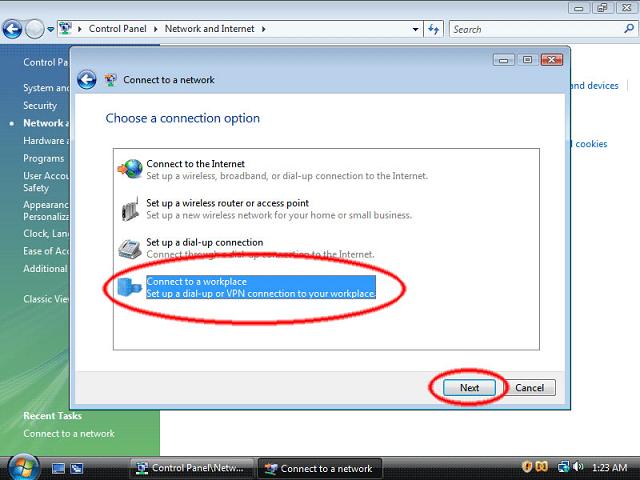
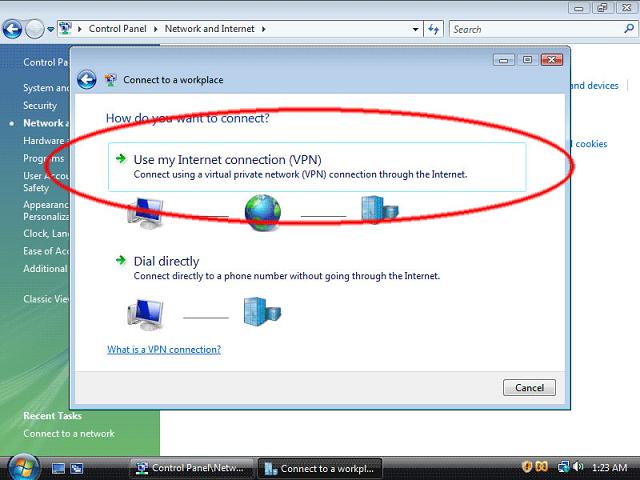
6. On the following screen choose "Connect to a workplace" and then click "Next."
7. Click "Use my Internet connection (VPN)."
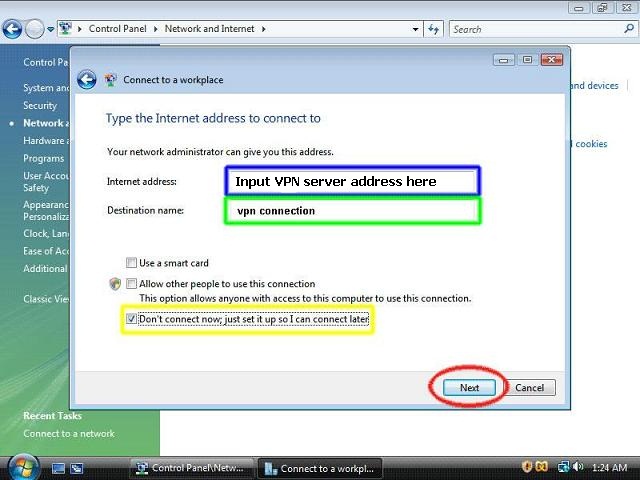
8. After that you need to enter the server information: "Internet address" - vpn server address ( hilighted in blue). This is the Internet address of your vpn server.
In the text box "Destination name" type "vpn connection" (hilighted in green).
This is the connection name, and it will be shown in the "Connect to a network" screen when you finish.
Then, make sure that the checkbox "Don't connect now; just set it up so I can connect later" (hilighted in yellow) is checked.
After that click the "Next" button.
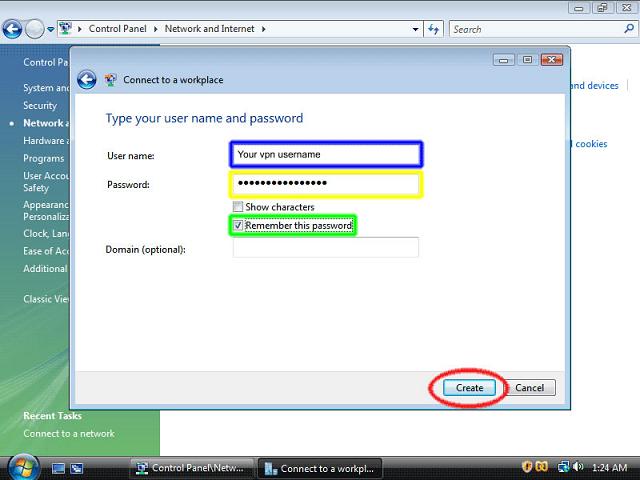
9. On this step please enter your VPN account username and password.
Optionally, check the "Remember this password" checkbox (hilighted in green) if you do not want to enter your password every time when you connect to VPN server.Then, click the "Create" button.
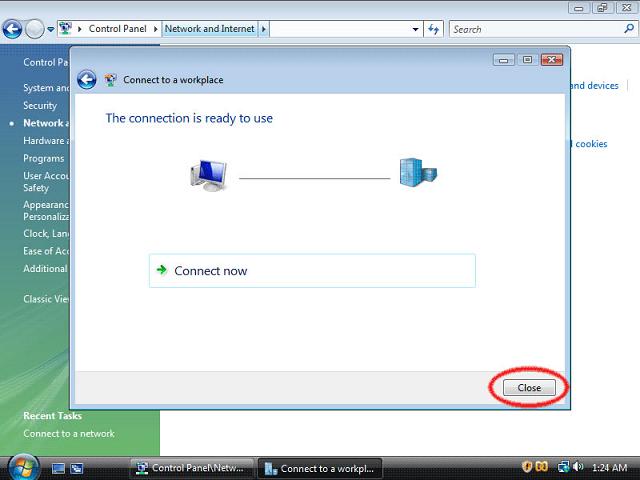
10. Your vpn connection is ready. You must see the next screen. Click "Close" button to return to the "Network and Internet" page.
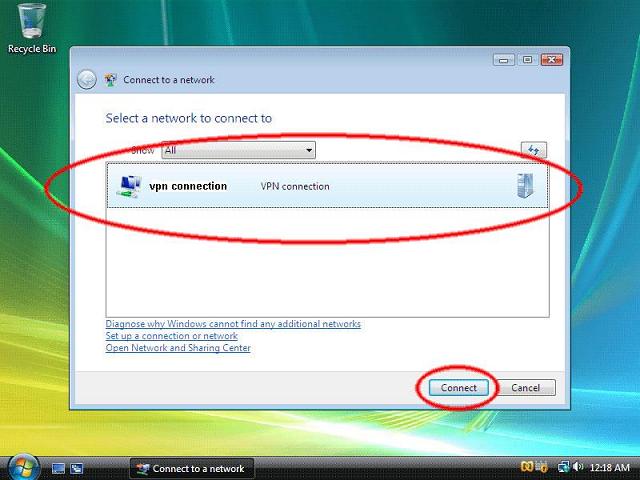
11. Click on "Connect to a network".

12. Lastly, click on the VPN connection and click "Connect".